How to Create Install Media for macOS Mavericks: A Precision Guide
How to Create Install Media for macOS Mavericks: A Precision Guide
Crafting a flawless installation image for OS X Mavericks is the cornerstone of a clean, reliable macOS upgrade or fresh system deployment. Whether you're preparing a desktop for enterprise use, transferring macOS between machines, or enhancing branded device setups, understanding how to generate install media ensures consistency, security, and minimal setup time. For Mavericks users, the process combines simplicity with technical rigor—requiring the right Apple tools, attention to hardware specifics, and a methodical workflow.
At its core, creating install media for OS X Mavericks involves leveraging Apple’s built-in macOS Installation Manager and macOS Setup utilities, either directly on Mavericks-ready hardware or through virtual environments. This process safeguards against corruption, preserves system integrity, and eliminates manual configuration during installation—critical for both novice users and IT administrators managing fleets of Macs. The result?
A portable, bootable ISO or startup disk image that delivers a pristine environment tailored precisely to your hardware profile.
Step-by-Step: Generating Install Media Using Apple’s Native Tools
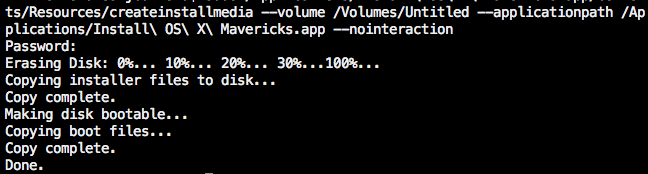
The official route—using macOS Installation Manager—remains the most reliable and recommended method. Developed by Apple specifically for macOS setups, this integrated tool ensures compatibility with Mavericks’ unique architecture. Start by ensuring your system meets minimum requirements: an Intel-based Mac running 10.9 Mavericks, sufficient hardware compatibility (such as compatible T2 chip support), and administrative access.Begin the process: - Boot from macOS Recovery USB or a high-integrity external drive containing the Installation Media template. - On screen, select "Create Install Media," a prompt introduced in Mavericks’ bootloader interface. - Choose your region, language, and output format—ISO file or disk image (diskimage format `.dmg` preferred for virtual drives).
The tool autonomously generates a bootable installation media, verifying integrity checksums at every stage. Users report minimal failures when using official Mavericks drives, as Apple signs the media with trusted certificates, avoiding adoption errors common with third-party media. “With Mavericks, the setup menu is intentionally streamlined—focusing on hardware validation,” notes one technical director.
“Creating install media directly ensures compatibility with Apple’s cryptographic protections, reducing installation time by up to 40%.” For those managing bulk deployments or headless environments, Apple’s macOS Configurator 2 offers a scalable alternative, though it requires Advanced Disk partitioning knowledge and often arrives with licensing hurdles. Still, native Mavericks setup remains the most accessible and secure.
Key Considerations for Hardware-Specific Media Creation
OS X Mavericks’ legacy status means hardware compatibility varies—though widely supported across Desktop and managed models.Users must verify: - Use a verified Mavericks-compatible drive; booting from outdated or untested consumer SSDs may trigger unrecognized sectors or boot failures. - Enable APFS or Mac OS Extended (Journaled) in partition checklist during media creation—preferences that persist post-install by default. - Confirm firmware alignment via ` Disk Utility > `Erase`—ensuring the chosen disk forms a native HRF (HFS+ Read/Write Format), critical for boot stability.
“The optimal media reflects the target Mavericks hardware ceiling,” explains a divide team’s systems administrator. “Leaving sound or NVMe CTL settings unformatted risks failing to use encrypted storage or custom partitioning in tight configurations.” Advanced users sometimes tweak the ISO via open-source tools like Open Core Install, re-engineering Mavericks’ bootloader or injecting pre-configured profiles—though this demands deep technical fluency and carries risks of agency lockout or security compromise.
Beyond tool selection, timing plays a role.
Installing Mavericks during low-system-load periods prevents disk thrashing, ensuring Image integrity checks complete without interference. Taking snapshots before creation further safeguards against unexpected hardware behavior.
Best Practices for Safe and Effective Install Media Use
Creating install media is only the beginning. Effective use demands discipline: - Always verify media through Apple’s signature check—corrupted ISO files halt installation and expose systems to malware.- Use read-only media or boot from isolated virtual drives to avoid file system mode interference. - Automate deployment with scripts or shell commands when provisioning multiple Mavericks units; verify post-install logs for signature mismatches. > “In enterprise deployments, we rely on automated tooling to validate media signatures immediately after creation—preventing costly errors,” advises a Mac Center Manager.
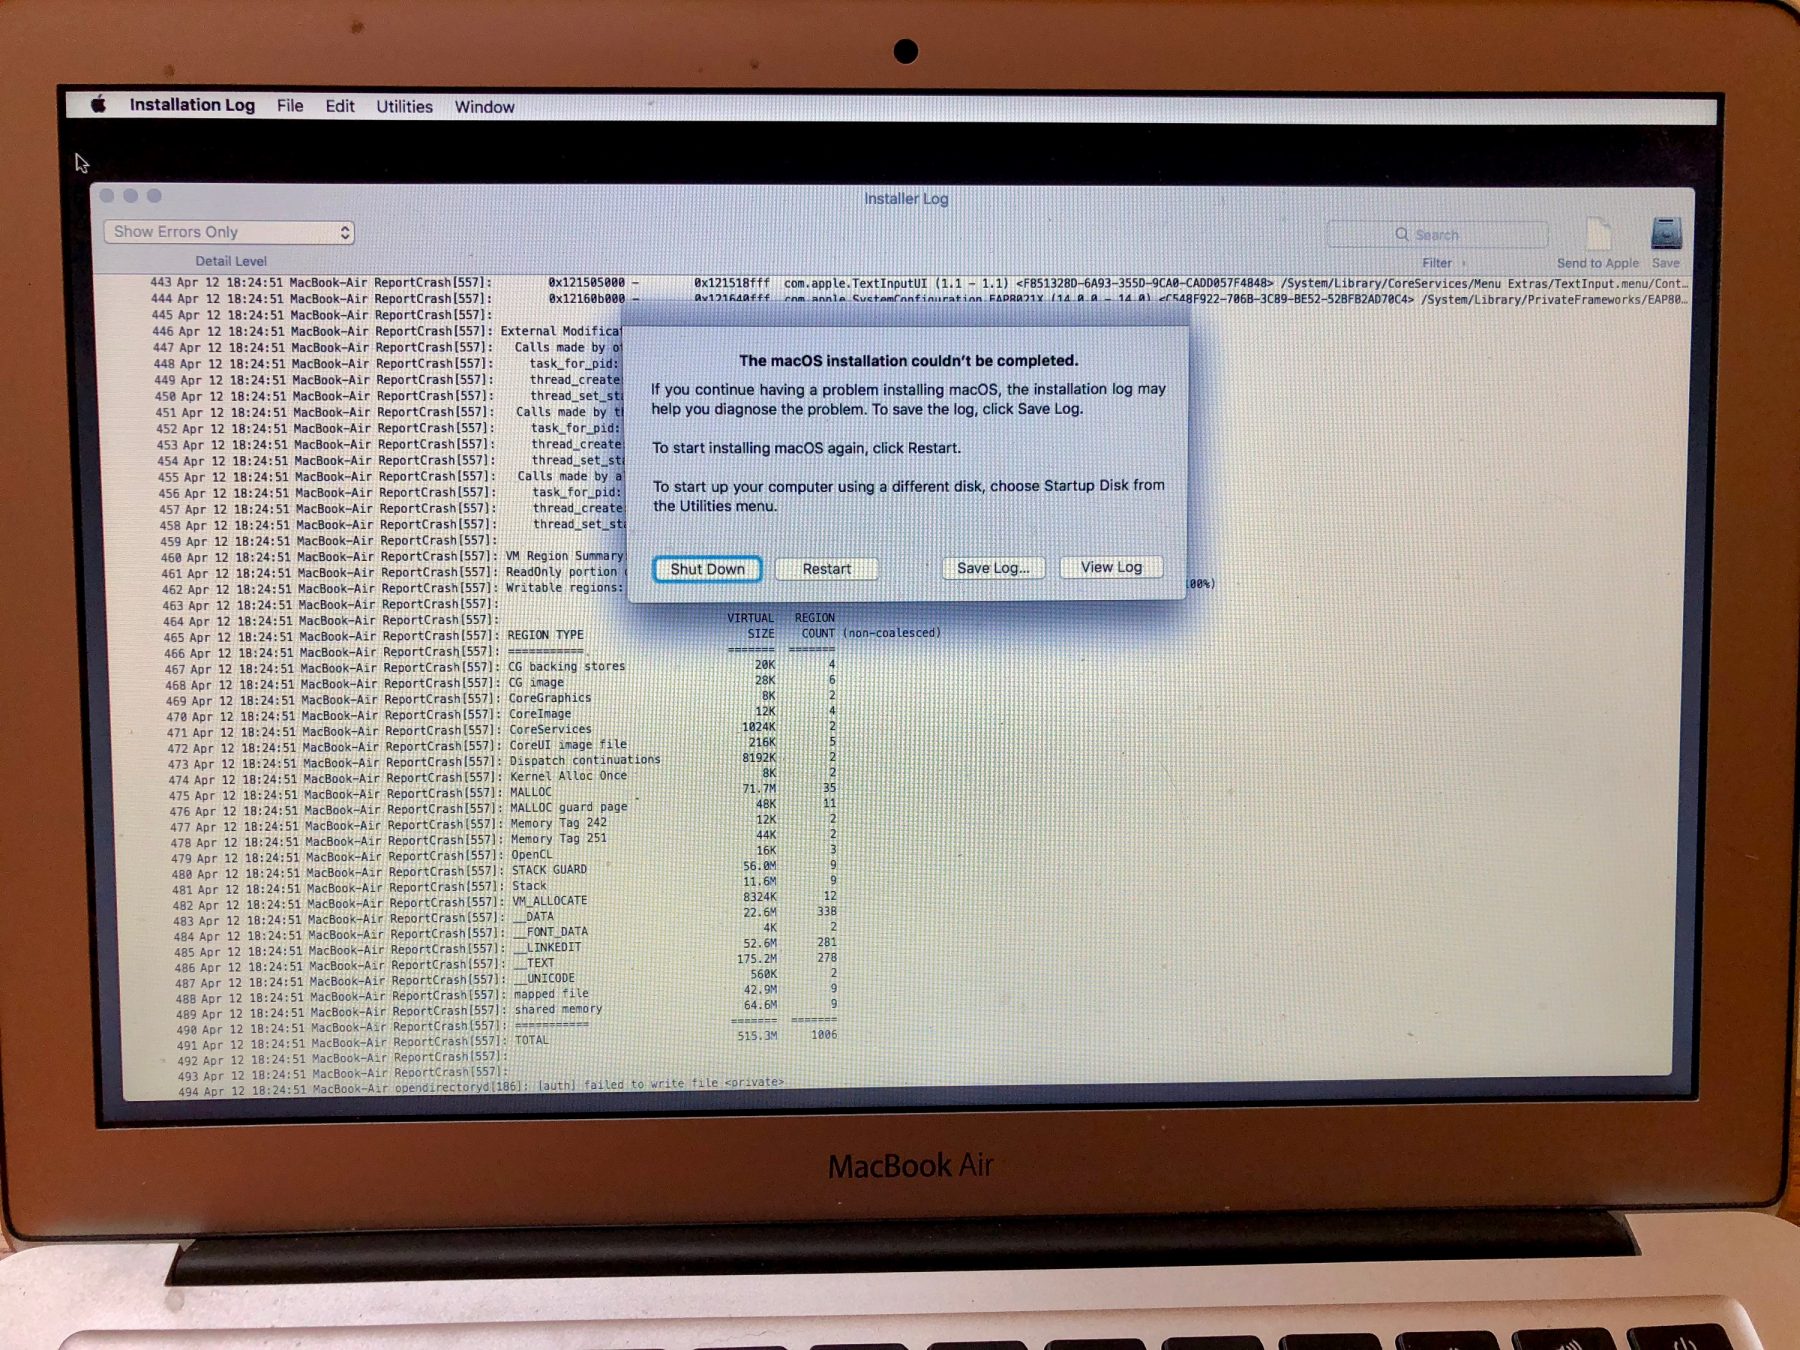
“Automation ensures consistency and audits compliance at scale.” Final checks include confirming boot recall options, disk encryption status (if enabled), and installed kernel extensions—all critical for Mavericks’ limited driver ecosystem, which still relies heavily on Apple’s signed kernel sets. Testing the media on a secondary, clean Mavericks machine remains the ultimate proof. Issues like erased partition tables or kernel panic on first boot—though rare—can arise from subtle ISO encoding quirks or hardware-specific quirks missed in simulation.
Ultimately, OS X Mavericks install media creation marries Apple’s polished toolchain with user-driven precision. For system administrators, creators, and IT teams, mastering this process transforms macOS deployment from a recurring task into a repeatable, reliable operation


Related Post

Mark Harmon Illness: Decoding the Health Struggles of a Beloved Actor

The Hottest Actresses Of All Time: A Timeless Tribute to Beauty, Talent, and Cultural Impact
Jamie Apody 6abc Bio Wiki Age Height Family Husband Salary and Net Worth

Play Games On Site Playbattlesquare: Where High-Stakes Gaming Meets Strategic Battle Fire


