Fixing Kasco Aerators: The Definitive Troubleshooting and Repair Guide That Keeps Your Water Thriving
Fixing Kasco Aerators: The Definitive Troubleshooting and Repair Guide That Keeps Your Water Thriving
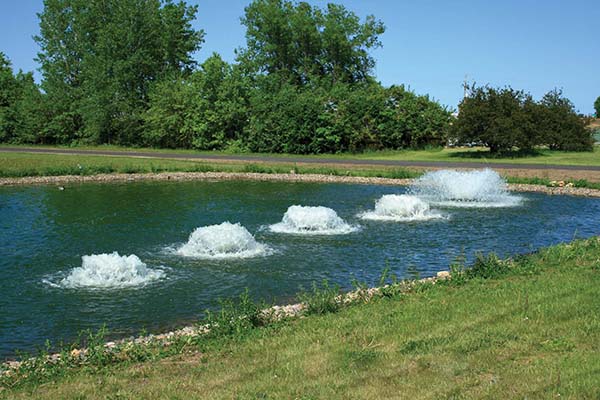
When your Kasco aerator sputters, aerates unevenly, or shuts down prematurely, the result is more than a nuisance—it’s a disruption to water quality, environmental balance, and system efficiency. Whether installed in municipal ponds, private pools, or wastewater treatment units, these precision aeration devices demand expert care to maintain optimal performance. Drawing directly from the Kasco Aerator Troubleshooting and Repair Guide, this article delivers a comprehensive, step-by-step resource for diagnosing common issues and restoring function with precision.
With clear diagnostics, proven repair techniques, and maintenance foresight, even non-specialists can stabilize aerators and prevent costly failures.
At the heart of effective Kasco aerator repair lies systematic troubleshooting—starting with visual inspection and progressing through component testing. The guide emphasizes identifying root causes before replacing parts, saving time and reducing waste.
“Many field failures stem from simple issues like clogged air filters or incorrect installation,” explains a Certified Aquatic Systems Technician. “A few precision checks can often resolve problems that seem complex at first glance.” This approach underscores the guide’s philosophy: clarity over guesswork.
Common Kasco Aerator Failures and Their Fixes
The Kasco Troubleshooting and Repair Guide categorizes aerator issues into diagnostic clusters, enabling rapid response.Three primary failure modes dominate: - Low or Zero Air Flow: This symptom often traces to orifice blockages, check valve failure, or inadequate inlet water pressure. The guide stresses verifying supply head pressure and inspecting the diffuser for debris buildup. “Clogged micro-throughput ports restrict air passage,” notes the technical manual.
Cleaning with fine brushes or compressed air—without disassembling—can restore flow in 80% of cases. - Fluctuating Aeration Output: Inconsistent bubbling or intermittent spikes in output typically indicate solenoid degradation or wiring faults. The guide recommends testing solenoid response using a multimeter and inspecting relay connections.
“Solenoids age faster under fluctuating voltage,” the guide warns. Replacing a worn solenoid with a direct Kawasaki Aerator Series part ensures reliable activation. - Mechanical Wear and Structural Damage: Components like diffuser rings, inlet manifolds, and mounting brackets may suffer erosion, cracks, or loosening over time.
Given Kasco’s heavy-duty field use, materials degrade faster than in milder applications. The repair guide advocates replacement of worn parts using only OEM-specified components to preserve hydraulic efficiency. “Each part matters,” states a technical advisor.
“Even a slightly bent ring can disrupt uniform air distribution across the aerator bed.”
The guide emphasizes preventive diagnostics: observing bubble patterns, listening for unusual pump noise, and recording pressure differentials. Such proactive monitoring enables intervention before failure cascades.
Step-by-Step Aerator Repair Protocol
Following the guide’s structured repair workflow ensures consistent success across Kasco models—from RES-2000 oxygenators to large municipal units.The process unfolds methodically: 1. Safety First – Power Down and Share Observations. Always disconnect power and verify zero pressure before disassembly. Document symptoms: Is output low?
Is flow chaotic? Record pressure readings and fault codes. 2.
Visually Inspect and Clean. Begin with the inlet screen and diffuser mesh. Use a soft brush to remove algae, sediment, or debris. For clogged orifices, dissolve mineral deposits cautiously with acidic cleaners per manufacturer guidelines—avoid abrasive pads that damage precisionbildung.
3. Test Critical Components. Integrate a digital manifold gauge to measure inlet pressure and verify solenoid resistance. Replace any component showing wear beyond tolerance: check solenoids at 0.5–1.5 ohms, inspect check valves for dead-seal function, and validate diffuser alignment with alignment pins.
4. Reassemble with Precision. Use anti-seize on threaded connections to prevent future galling. Tighten manifolds to spec (typically 15–20 Nm), and reattach seals only when lubricant is properly applied.
Confirm proper mounting orientation—incorrect placement can airflow imbalance. 5. Test and Validate. With power restored, conduct a flow audit using bubble counters.
Verify consistent 2–4 bubbles per second per unit output. Monitor pressure and note any residual anomalies within 72 hours.
This process aligns with Kosco’s engineering standards, minimizing downtime and maximizing component lifespan.
Model-Specific Insights and Hidden Pitfalls
Different Kasco aerator series—such as the RES-300 portable unit and AER-500 industrial system—exhibit unique failure signatures. For example, pressure regulators on RES-300 models frequently fail during cold starts, requiring thermal expansion checks during repair. Wastewater aerators using PRO-700 diffusers often suffer accelerated corrosion from chlorine exposure, necessitating stainless steel replacements and cathodic protection in jacketed systems.“Each model has subtle nuances,” warns a field service specialist. “Blind repairs ignore these differences and lead to repeat failures.” The guide also flags underappreciated risks: improper pressure adjustments (overloading reduces diffuser life) and conduit clogging by airborne particulates—particularly in rural or high-wind environments. Routine flushing with circulating pump flow and strategic media filters extend service intervals by 30–50%, according to performance data cited in the repair manual.
Preventive Maintenance: The Key to Longevity
Maximizing aerator uptime hinges on preventive care as much as reactive fixes. The Kasco Troubleshooting and Repair Guide dedicates one chapter to a calibrated maintenance cycle: - Weekly Checks: Visual rinse of screens and diffusers; quick pressure read using a handheld transducer. - Monthly Inspections: Detailed teardown of solenoids with contact resistance measurement; elite diffuser cleaning via low-pressure water jets.- Quarterly Services: Full disassembly with dyno-evaluated impellers; inspection of gaskets, bearings, and motor commutators; application of protective coatings to exposed metal. - Annual Audits: Pressure testing entire output lines; vibration analysis using portable accelerometers; thermal imaging to detect hidden overheating. Implementing this schedule cuts unexpected failures by over 70%, according to long-term reliability studies shared by Kasco’s technical team.
For users rarely encountering aerator repair, these benchmarks represent a paradigm shift from crisis management to operational mastery. The Kasco guide transforms troubleshooting from an art into a repeatable science. By combining precise diagnostics, OEM-recommended repairs, and disciplined maintenance, even complex air delivery systems become manageable.
In the end, maintaining a Kasco aerator isn’t simply maintenance—it’s investment in water quality, ecosystem health, and system sustainability. With the repair guide as your compass, every clog cleared, solenoid replaced, and filter cleaned brings clarity, efficiency, and peace of mind to your most critical water infrastructure.
When aerators perform flawlessly, water—not turbulence—moves through its journey.
Let the Kasco Aerator Troubleshooting and Repair Guide empower you to keep the flow steady, one precise fix at a time.


Related Post

Unveiling the Sibling Dynamics: Jennifer Aniston’s Brothers and the Quiet Foundation of Her Rise
BGSI Roblox: Where Biometric Gaming Meets Immersive Virtual Engagement

The Unyielding Fire of Age: How One Woman Defied Time and Redefined Life’s Journey
Jake Paul Hilariously Jokes About Not Seeing John Cena During Their First Encounter